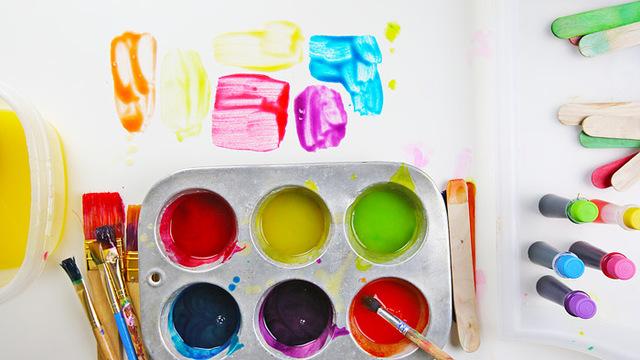
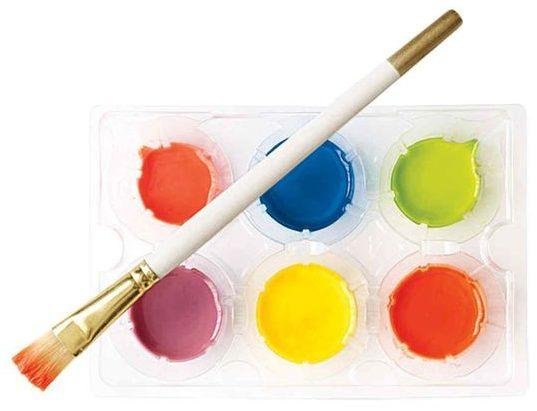
How to make DIY paints at home
 Does your kid love to paint, or is he just about to get acquainted with this fascinating process? Prepare for creativity natural and safe paints that can be used in different ways – for finger painting, creating masterpieces on the tiles in the bathroom when bathing, for making souvenirs and gifts for loved ones.
Surely the following 8 do-it-yourself paint recipes will be appreciated by both children and parents!
The content of the article:
- Natural “watercolor” paints
- Bath paint
- Finger paints – 4 recipes
- Stained glass paints
- Volumetric salt paints

Natural “watercolor” paints for children of all ages!
You have the opportunity to prepare with your child paints for drawing from natural ingredients, which are not only harmless, but also somewhat useful if the toddler eats them!
What you need:
- Yellow paint – turmeric, saffron.
- Orange – carrot juice.
- Red, pink, raspberry – beet juice, tomato juice, berry juice (viburnum, raspberry, strawberry, cranberry).
- Green – juice of spinach, parsley, dill, celery.
- Blue, purple, lilac – the juice of red cabbage, currants, blueberries, blackberries, mulberries (mulberries).
- Brown – coffee, tea, cinnamon, cocoa, chicory, decoction of onion peel or pomegranate peel.
How to cook:
- Wash berries or vegetables, squeeze out the juice.
- If you are preparing paints from dry spices, coffee or chicory, dilute a tablespoon of the powder with a little water.
- Green dye is easiest to make with pre-shredded and then frozen greens. Remove a bag or container of puree from the freezer, defrost it without opening it, and squeeze it through a cloth or sieve.

Usage tips:
- Natural dyes can be used in our other recipes as natural dyes.
- Keep in mind that natural paints will not last more than two hours at room temperature and more than 24 hours in the refrigerator. But they can be successfully frozen in airtight containers. If you have prepared a large portion of paints, do so.
- If you want to keep your child busy with drawing right now, and you don’t have time to squeeze juice from vegetables and berries, do it differently. Cut the washed vegetables and herbs into small pieces (of course, everything should be very fresh and juicy), put the berries in separate outlets, and then offer the child a sheet of white paper and ask them to depict something using pieces and whole berries. We are sure that the child will absolutely love it!
- If you want to make unusual paints for drawing for a child, namely, ice, then after class, drain the ice molds remaining into the cells (it is better to take with square or rectangular cells), insert into each ice cream stick, or a cotton swab, and send form in the freezer. After freezing, you will have a great set for drawing with ice cubes, for this remove the form from the freezer, wait a couple of minutes – and you can draw!

Bathroom paints
Is your child reluctant to go swimming? Then you just need to captivate him with excellent creativity – drawing on the bathtub and tiles!
Do not worry, there will be no traces of creativity in the bathroom – these paints are perfectly cleaned from surfaces. And the child himself will not receive colored “tattoos” on the skin after bathing.
The child’s age is 2-5 years.

What you need:
- 2 parts * baby colorless shampoo.
- 1 part cornstarch
- 1 part water.
- Food colorings.
* That is, if you measure with a glass, then take 2 glasses of shampoo + 1 glass of starch + 1 glass of water.
How to cook:
- In a metal or enamel bowl, mix water with starch (preferably warm water), then add shampoo and stir well, but do not beat! There should be no foam.
- Place the cookware on moderate heat and simmer until boiling, stirring constantly.
- After boiling, remove from heat. The mixture should look like a thick jelly. Let cool until warm.
- Divide the mixture into bowls or jars – their number will be equal to the number of your “paints”. For small children, I recommend making only 3-4 basic colors; for older children, you can play with a mixture of colors and shades.
- Add 1-2 drops of different food colors to each portion of the base, no more. I do not recommend making a very saturated color, because it will be more difficult to wash it off the child’s skin. Stir each serving well (use a different spoon or wooden spatula – eg ice cream feet).
- Transfer the resulting paints to pre-prepared jars with well-closing lids (not glass, because you will use paints in the bath!). Jars of old finger paints, creams, small food containers, etc. will do.
Everything, the paints are ready – it’s time to swim!
Usage tips:
- Never leave your child alone in the bathtub. Is an important safety issue!
- If the child is small, make sure that he does not eat your paints.
- It is advisable to have an oblong tray under the paints so that the paints do not fall into the water. You can use bath holders for soap and washcloths.
- The child can paint with their fingers or a piece of sponge.
- First, show your child how to use paints and what to paint on the bathtub, tiles, or even his tummy.
- At the end of the water treatment, these drawings will need to be washed off the surfaces. So that the kid does not get upset, buy him a water pistol – and he will gladly say goodbye to his arts himself. Don’t forget to praise him for his accuracy!

DIY finger paints – 4 recipes for the little ones
There is nothing better than self-made baby paints when you are sure they are harmless – even if the child pulls them into their mouths.
Children age – 0.5-4 years
Recipe 1 – what you need:
- Unflavored baby yoghurt.
- Natural or food coloring.
How to cook:
- Mix yogurt with 1-2 tablespoons of natural – or 1-2 drops of food coloring.
- Use paints immediately!

Recipe 2 – what you need:
- 0.5 kg of wheat flour.
- 0.5 cups of fine table salt.
- 2 tablespoons of vegetable oil.
- Water to the required consistency.
- Food or natural colors.
How to cook:
- Mix flour and salt, add oil.
- Pour in water until the mass acquires the consistency of thick sour cream.
- Divide into portions, mix each with 1-2 tablespoons of natural dye, or 1-2 drops of food coloring.
Recipe 3 – what you need:
- Water – 600 ml.
- Rice – 100 gr.
- Salt – 1 tablespoon.
- Vegetable oil – 2 tablespoons.
- Food colorings.
How to cook:
- Cook liquid porridge from water and rice.
- By the end of cooking, add salt to the mass, pour in vegetable oil.
- Punch the mass with a blender until a homogeneous “jelly” is obtained.
- After cooling, divide the mass into parts, add 1-2 drops of food coloring to each, mix.
- Use the paints immediately after preparation.

Recipe 4 – what you need:
- Mashed potatoes from boiled beets, carrots, spinach.
- Puree from fresh berries – cherries, strawberries, raspberries, cranberries, currants.
- Boiled red cabbage puree.
How to cook:
- Punch boiled vegetables and fresh berries well with a blender and put them in different jars (bowls).
- If the child is half a year old – wipe the puree from berries with seeds additionally through a sieve.
- Do not use those berries and vegetables to which the child has previously been allergic.
Application Tips:
- Materials for finger painting according to these recipes are not stored, so they must be prepared immediately before creativity.
- For finger drawing for children from 1 year old, I recommend using very large sheets of Whatman paper, laid on a waterproof base on the floor. Of course, the floor must be warm and the room temperature comfortable. Sheets can also be laid on a table, secured to a low easel or wall.
- Before drawing, I recommend stripping the child to panties (diapers) – not only for the safety of clothes, but also for the little artist’s freedom of movement. And then, it’s such a happiness – to draw on your own tummy!
- In the process of drawing, you can ask the child to attach colored palms to a pre-prepared sheet of thick paper. After drying, this drawing can be left as a keepsake, framed and hung on the wall, next to the baby’s photo.

DIY stained glass paints
These paints can be painted on thick cardboard, glass, wooden surface, mirror, tile, porcelain plate.
Drawings are durable in a dry environment.
The age of children is 5-8 years old.
What you need:
- PVA glue.
- Dyes.
How to cook:
- Pour 2-3 tablespoons of glue into small jars with tight-fitting lids and a wide mouth.
- Add colorants to each serving. Stir with wooden sticks until the color is uniform. The paints are ready.

Application Tips:
- With these paints, you can paint directly on the selected surface.
- Or you can put the drawing on an office file or glass (always in a frame and under the supervision of adults!) – and let it dry for several hours. Then carefully remove the pattern from the base and glue it to any smooth surface – a corner of a mirror or window, a tile, a plate, etc. These pictures don’t have to be big.

Volumetric salt paint for painting
These paints allow you to create voluminous “puffy” paintings, they are very popular with children.
The child’s age is 2-7 years.
What you need:
- 1 part flour.
- 1 part salt.
- The required amount of water for mixing.
- Food colorings.
How to cook:
- Mix flour and salt.
- Add water in small portions, stir until smooth.
- As a result, the mass should resemble pancake dough – drip from the spoon in large drops.
- Divide the mass into different containers, add dyes to each part.

Usage tips:
- It is better to paint with voluminous paints on thick cardboard.
- The paint should be applied with brushes, wooden ice cream spatulas or even coffee spoons.
After drying, the picture acquires volume, “puffiness” of colored drops.
After drawing with your child with homemade paints, try to make homemade clay, moon or kinetic sand, artificial snow for modeling with your own hands!
What to give a friend?
Gift Certificate! You can give it to your loved one or use it yourself.
And we also give away a certificate for 3000 rubles every month. among new email subscribers. Subscribe!
Select a certificate in the store
Visit Bologny for more useful and informative articles!


